Skip to content
  • 6 Votes
    5 Posts
    964 Views
    barisB

    Quick start plugin has an example on how to add a new api route https://github.com/NodeBB/nodebb-plugin-quickstart/blob/master/library.js#L40-L76.

    The hooks that are fired client side are for client side code in plugins. If you want to pass data from the client to the server you have two options.

    Create an api route like in quick start plugin Create a new socket event listener on the server side and use socket.emit() client side. Example here
  • 1 Votes
    8 Posts
    439 Views
    phenomlabP

    @frontendjulien Always happy to help.

  • 11 Votes
    3 Posts
    571 Views
    crazycellsC

    @brazzerstop thanks for sharing!

  • 6 Votes
    25 Posts
    986 Views
    phenomlabP

    For anyone following this thread, new stable release is here. If you use Cloudflare, please also see notes around that

    Link Preview Image Switch between list and card view function

    After a significant rewrite of the code plus the CSS, I’m pleased to release this stable version. There are some changes however. The external CSS file is n...

    favicon

    Sudonix | A one-stop-shop for all your technology questions (sudonix.org)

  • 1 Votes
    2 Posts
    106 Views
    ernstkiE

    @nhl-pl Good resource, thanks for sharing!

  • 12 Votes
    24 Posts
    3k Views
    barisB

    @saikarthikp9 https://www.screentogif.com/

  • 6 Votes
    4 Posts
    232 Views
    DownPWD

    Thanks dude @baris

    Works great know on Smartphone an Desktop 🙂

    Love it !

  • 6 Votes
    6 Posts
    399 Views
    crazycellsC

    @baris I think even for tags, this "distribution bar" above makes more sense than the "progress bar" since tags are not competing with each other to reach #264... so, their "progress" is not that important...

    Screen Shot 2023-08-10 at 20.18.17.png

  • 3 Votes
    25 Posts
    2k Views
    E

    @baris Awesome, thank you!

  • 2 Votes
    9 Posts
    3k Views
    PitaJP

    @S-Yang indeed, mailer putting take precedence over the built-in SMTP mailer.

  • 15 Votes
    106 Posts
    64k Views
    phenomlabP

    @DownPW I'm not sure it's solely traffic that causes this. I took saw this frequently when I used Cloudflare and it became so bad that I decided to stop using the service altogether.

    No issues since.

  • 6 Votes
    11 Posts
    3k Views
    J

    @Sebastix to reset admin password run:
    . /nodebb user reset 1 --pssword

  • Setup OGProxy for use in NodeBB

    Tutorials
    6
    1 Votes
    6 Posts
    276 Views
    phenomlabP

    @brazzerstop yep. Already discussed with Julian. Hotlink protect is enabled on my domain. I've seen numerous cases whilst writing the server sudonix uses, and so I fill the gap with a pretty 404 image.

  • 4 Votes
    12 Posts
    798 Views
    DownPWD

    @brazzerstop said in [manual] Build a Dock Panel:

    If you mean show "select category" on every category/topic page, I think no.

    yep It's that what I mean, I have testing with category number 0 but don't working

  • 5 Votes
    1 Posts
    239 Views
    B

    Hi everybody 🌴

    Today I show you how to make a sticky brand header and avatars in Harmony.
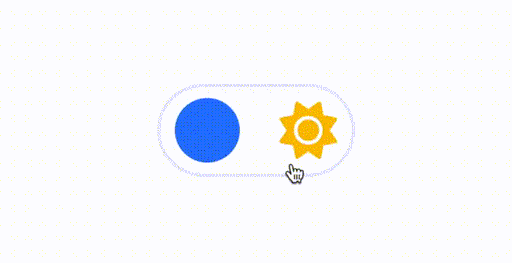
    preview

    Step-by-step

    We need modify 6 files: library.js, harmony.json, theme.tpl, harmony.tpl, brand.tpl, post.tpl to add 3 new settings:

    Sticky avatars (user avatars in the posts) Sticky header (brand header) Setting to show sticky header on mobile devices

    First we add a new settings in library.js

    Paste this code after this line stickyAvatars: 'on', stickyHeader: 'off', stickyHeaderMobile: 'off', Paste this code after this line config.stickyAvatars = config.stickyAvatars === 'on'; config.stickyHeader = config.stickyHeader === 'on'; config.stickyHeaderMobile = config.stickyHeaderMobile === 'on';

    Now we need add translation for the new settings in harmony.json

    Paste this code after this line "settings.stickyAvatars": "Sticky user avatars in posts", "settings.stickyHeader": "Sticky header on desktop", "settings.stickyHeaderMobile": "Show sticky header on mobile",

    Next step, create controls of new settings in ACP and user profile in harmony.tpl and theme.tpl

    Paste this code after this line in harmony.tpl <div class="form-check form-switch"> <input type="checkbox" class="form-check-input" id="stickyAvatars" name="stickyAvatars" /> <label for="stickyAvatars" class="form-check-label">settings.stickyAvatars</label> </div> <div class="form-check form-switch"> <input type="checkbox" class="form-check-input" id="stickyHeader" name="stickyHeader" /> <label for="stickyHeader" class="form-check-label">settings.stickyHeader</label> </div> <div class="form-check form-switch"> <input type="checkbox" class="form-check-input" id="stickyHeaderMobile" name="stickyHeaderMobile" /> <label for="stickyHeaderMobile" class="form-check-label">settings.stickyHeaderMobile</label> </div> Paste this code after this line in theme.tpl <div class="form-check mb-3"> <input class="form-check-input" type="checkbox" id="stickyAvatars" name="stickyAvatars" {{{ if config.theme.stickyAvatars }}}checked{{{ end }}}> <label class="form-check-label" for="stickyAvatars">settings.stickyAvatars</label> </div> <div class="form-check mb-3"> <input class="form-check-input" type="checkbox" id="stickyHeader" name="stickyHeader" {{{ if config.theme.stickyHeader }}}checked{{{ end }}}> <label class="form-check-label" for="stickyHeader">settings.stickyHeader</label> </div> <div class="form-check mb-3"> <input class="form-check-input" type="checkbox" id="stickyHeaderMobile" name="stickyHeaderMobile" {{{ if config.theme.stickyHeaderMobile }}}checked{{{ end }}}> <label class="form-check-label" for="stickyHeaderMobile">settings.stickyHeaderMobile</label> </div>

    The finally we modify a theme files post.tpl and brand.tpl

    Replace the code in this line with a new code in post.tpl <div class="icon py-1 bg-body d-none d-sm-block {{{ if config.theme.stickyAvatars }}}position-sticky{{{end}}}" {{{ if config.theme.stickyAvatars }}}style="top:7.5rem;"{{{end}}}> Replace the code in this line with a new code in brand.tpl <div class="container px-md-4 brand-container {{{ if config.theme.stickyHeaderMobile }}}sticky-top{{{end}}} {{{ if config.theme.stickyHeader }}}sticky-lg-top bg-body pt-3{{{end}}}" {{{ if config.theme.stickyHeader }}}style="margin-top:-1rem;"{{{end}}}>

    /.nodebb build

    🖖 Happy Dev

  • 0 Votes
    21 Posts
    1k Views
    phenomlabP

    @Topper Always happy to help. Good luck !

  • 8 Votes
    1 Posts
    288 Views
    barisB

    Since NodeBB 1.18.6 it is possible to create dropdowns in the navigation (https://github.com/NodeBB/NodeBB/issues/9967). Before 1.18.6 to accomplish this you would have to use nodebb-plugin-customize to modify the menu template or use javascript to inject the markup after page load.

    In this tutorial I will show you how to create a dropdown navigation item that replaces the default categories link with a dropdown. The final result will look like this:

    category-dropdown.gif

    First thing to do is to turn the navigation item into a dropdown, to do this head over to yourforum.com/admin/settings/navigation, select the categories navigation item and toggle the dropdown option.

    category-dropdown-1.gif

    Once this is done you can use the text area below the toggle to add your markup. To create a simple dropdown you would just add a list of dropdown items like so:

    <li><a class="dropdown-item" href="/categories">All</a></li> <li><a class="dropdown-item" href="/category/2/general-discussion">General Discussion</a></li>

    Since you can input html here you can create custom dropdowns. To achieve the same dropdown as the first gif use the below html code, no css is necessary.

    <li><a class="dropdown-item" href="/categories">All</a></li> <li class="dropdown-divider"> <li><a class="dropdown-item" href="/category/2/general-discussion">General Discussion</a></li> <li class="d-flex flex-column"> <a class="dropdown-item" href="/category/3/nodebb-development">NodeBB Development</a> <div class="d-flex flex-column px-4"> <div class="d-flex align-items-center gap-1"> <i class="fa fa-fw fa-caret-right text-primary"></i> <a class="btn-ghost-sm text-sm text-nowrap" href="/category/13/nodebb-blog">NodeBB Blog</a> </div> <div class="d-flex align-items-center gap-1"> <i class="fa fa-fw fa-caret-right text-primary"></i> <a class="btn-ghost-sm text-sm text-nowrap" href="/category/5/feature-requests">Feature Requests</a> </div> <div class="d-flex align-items-center gap-1"> <i class="fa fa-fw fa-caret-right text-primary"></i> <a class="btn-ghost-sm text-sm text-nowrap" href="/category/6/bug-reports">Bug Reports</a> </div> <div class="d-flex align-items-center gap-1"> <i class="fa fa-fw fa-caret-right text-primary"></i> <a class="btn-ghost-sm text-sm text-nowrap" href="https://explore.transifex.com/nodebb/nodebb/">NodeBB Localization</a> </div> </div> </li> <li><a class="dropdown-item" href="/category/7/nodebb-plugins">NodeBB Plugins</a></li> <li><a class="dropdown-item" href="#">...add more as needed...</a></li>

    Modify the links to match your forum categories. To create dividers between sections you can use <li class="dropdown-divider">

    Now you can navigate your categories without going to the home/categories page. 🎊

  • 0 Votes
    14 Posts
    717 Views
    S

    Hi @baris ,

    Just to provide some updates:
    I tested the w=<number of mongod instance> in my local and it works. However, in our real environment, we're using Amazon DocumentDB, which unfortunately doesn't support user defined write concern and ignored the configuration, it will always use the default MAJORITY.

    Based on the suggestion by DocumentDB, I guess we should use readPreference=primary in this case to ensure read-after-write result. Assuming DocumentDB will manage it so that for reads after write will prioritize primary and at the time routes other reads to secondary to avoid overloading primary. Just curious why we need to configure this instead of being a default behavior.
    https://docs.aws.amazon.com/documentdb/latest/developerguide/how-it-works.html#how-it-works.replication

  • 0 Votes
    2 Posts
    260 Views
    phenomlabP

    @julian nice idea, and one I can certainly make use of.

  • 0 Votes
    6 Posts
    415 Views
    PitaJP

    Oh are you using the one from the blog? Try our docs here instead:

    Link Preview Image Ubuntu (Recommended) - NodeBB Documentation

    favicon

    (docs.nodebb.org)